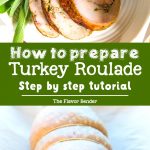
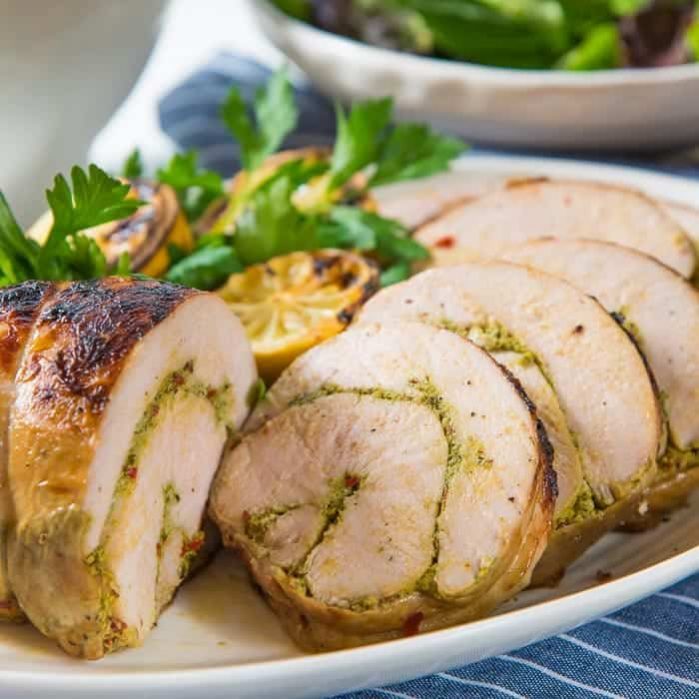
This moist, flavorful Turkey Roulade is a showstopping alternative to a whole roasted turkey for Thanksgiving! Here, I’ll be showing you how to make a turkey roulade.
This is a comprehensive guide to prep and assemble a full, on the bone turkey breast, and make it into a boneless, ready for roasting turkey roulade.
This year, like in years past, we won’t be prepping a whole turkey for our Thanksgiving spread. That’s a lot of food for just the two of us, too much clearly, and I’m not very fond of eating leftovers for a whole week. So the answer is to cook a smaller turkey dish, like a slow cooked turkey breast or oven roasted turkey breast or turkey legs even.
This year I’m making a Turkey Roulade with turkey breast! And here I’ll be showing you how to prep the turkey roulade.
Why I love to prep and cook a simple turkey roll for Thanksgiving
- It’s a lot easier to assemble than a whole turkey obviously (especially if you don’t need to take photos in the middle like I had to!).
- You can incorporate a variety of flavors into your turkey roulade.
- You can use a dry or wet rub for the middle if you prefer.
- Or you can use your favorite stuffing instead.
- You can make multiple batches (for a bigger crowd), and cook each roulade with a different flavor profile.
So today I’m going to show you how to assemble a turkey roulade, step by step – starting with a FULL TURKEY BREAST CUT, and end with a fully trussed turkey roulade ready to be cooked.

But first things first. You need a full turkey breast cut, of course. This includes BOTH turkey breasts, which will most likely be ON THE BONE, and with the skin (covering both turkey breasts).
Your butcher may also cut the turkey breasts for you from a full turkey if you ask. That’s what ours did for the turkey breast cut used in this post. OR your butcher may sometimes give you the ENTIRE turkey carcass with the breast meat and skin attached (including rib bones).
The easy way to work with this piece of turkey is to snip off the rib bones, either using kitchen shears (easier option), or a butcher’s knife.
How to prep a turkey roulade
Step one – Carefully remove the turkey skin
This is an easy step, but you have to do it carefully, so as not to tear or make holes in the skin. And DO NOT throw away the skin – you’ll be cleaning it and using it later to encase the turkey breast.

Step two – Remove the first turkey breast from the bone
To do this you will need a sharp paring knife (or if you’re deft with knives, you can use any sharp knife that you can manoeuvre well and isn’t heavy) to help separate the breast meat from the bone.
Locate the hard breast bone in the middle that separates the two turkey breasts. Make a cut along one side of the breast bone, making sure to stay as close to the bone as possible.
Continue to cut along the breast bone to separate the breast meat from the bone. You can gently lift the turkey breast meat to expose the bone so that you know where to cut to get a fully intact breast meat portion (see pictures below).


You will come across a tendon that attaches the breast meat to the bone (near the wing joint of the breast bone), just make a small cut to sever the tendon from the bone.

Now you have a completely separated piece of turkey breast. Repeat this process to separate the second turkey breast from the bone.

You should now have two turkey breast sections, and one turkey breast bone. Don’t discard this bone because you can roast this and make a flavorful turkey broth to make gravy!
Step three – Remove the turkey tenderloin
Remember the tendon that you snipped off earlier? That tendon is connected to the tenderloin. So locate the tenderloin that’s sitting just under the turkey breast, connected to the breast meat via connective tissue.
Gently peel off the tenderloin. This tenderloin will NOT be used in the turkey roulade, so you can use the two pieces of tenderloin to make a quick stir fry for dinner, or use it for sandwiches.

Step four – Butterfly the turkey breast meat
For a turkey roulade, you will not need to completely butterfly the turkey breast. Butterflying the turkey breast along the dotted line shown below will open up the breast.
The purpose of butterflying the breast is to make the piece of meat evenly thick throughout.

The way I do this is to use a sharp knife and then keep it flat on the turkey breast meat (in the middle), and then bring the knife up along the surface, towards the thicker end of the breast meat on the outside.
Then I start cutting into the breast only at the point where the meat curves up (that’s the dotted line shown in the picture above).

Then I gently peel the cut piece of turkey while making shallow cuts along the turkey breast until I can “open up” the cut piece of turkey breast to form a piece of meat that’s evenly thick (see below).
I then use the flat side of a meat tenderizer, just to smooth out the piece of meat.

Alternatively, you can use just the flat side of a meat tenderizer to make the breast meat even (without cutting and peeling as described above). Repeat with the second turkey breast and set both pieces aside.

Step five – Clean the skin
This is probably my least favorite step, but it’s a necessary one.
The turkey skin will have a lot of fatty sections, with some being thicker than others. You need to scrape off the fat WITHOUT tearing the skin. I use a knife held at a shallow angle and scrape the edge of the knife along the stretched out skin to remove as much of the fat as possible.
I am comfortable using the sharp edge of the knife to do this since I’ve done this many times before, and I can do it without accidentally tearing and cutting the skin. However, you can use the blunt edge of the knife to do this if you prefer.
After much of the fat has been removed, you will end up with a turkey skin that’s thinner than before, and can be stretched out tautly on your cutting board.

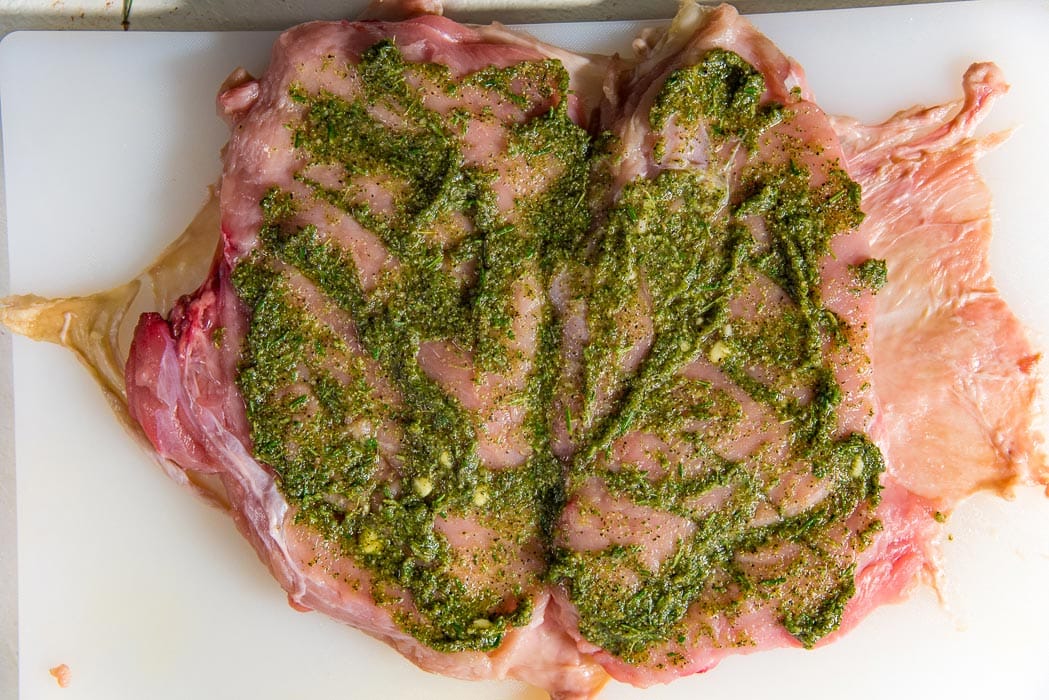
Step six – Prep the meat and skin
Use your hands to press down and stretch out the skin along the surface of your cutting board. Place the two pieces of butterflied turkey breast on the skin.

Make several shallow cuts on the turkey breasts and spread the marinade on top.

The marinade can be just salt and pepper, with some herbs and some garlic. OR you can make a really flavorful spice rub or a spice mix paste of your choice and spread this on the meat.
Then cut 7-8 long, cotton twine strings and set aside.
Step seven – Assemble the roulade (time to roll up the meat)
This part is fun to do, but can be tricky.
- Start at one end of the turkey breast and start rolling it up (as shown below), keeping it as tight/taut as possible. Do NOT roll up the turkey breast in the skin, yet.

- Once you have rolled up the turkey breast, while keeping it as tight as possible, place it on the stretched out turkey skin with the seam side of the turkey roulade facing up, and then wrap the skin around the roulade.
- The objective is to have the skin wrapped around the roulade, with the seams of both the roulade and the skin facing up.
- Tightly cover the rolled up turkey breast with the skin, and then place the roulade on the board with the seam side up as shown below.
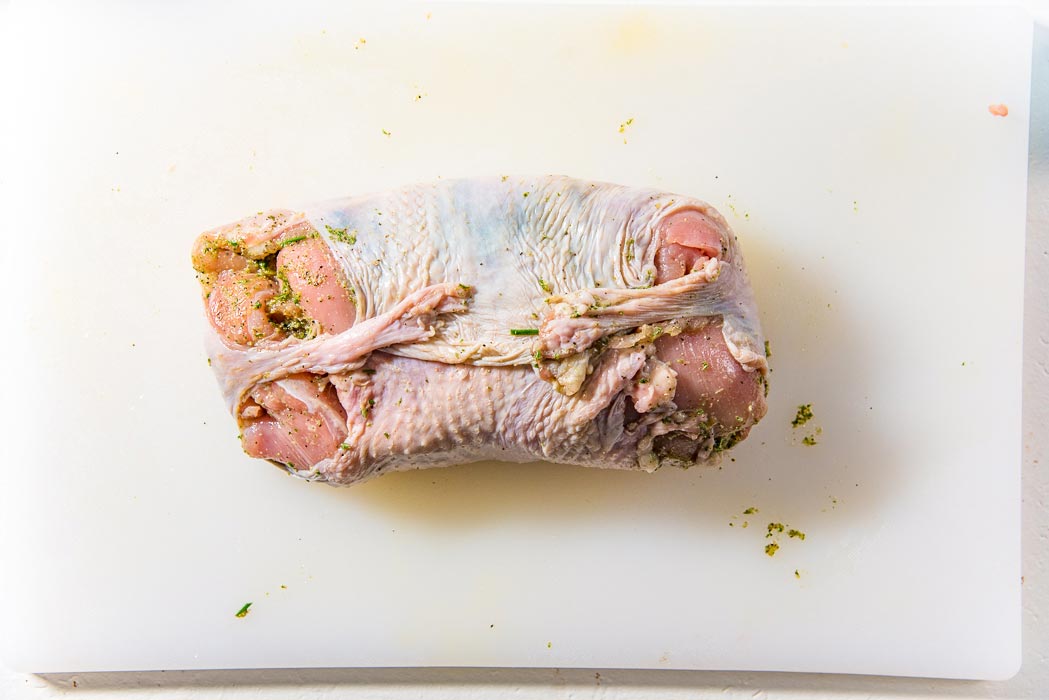
- Using the twine, tie the turkey roulade at 1 inch intervals as shown below. Tie the twine, starting from the ends, working your way towards the middle. This will help keep the shape of the roulade.

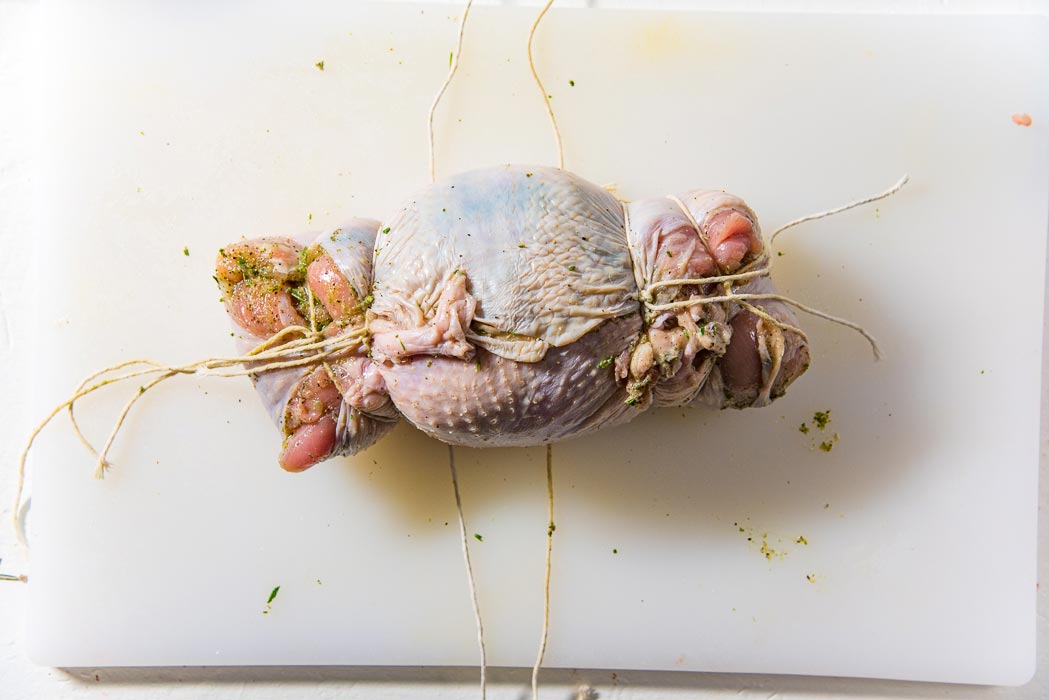
- Remember to tie the twine fairly tightly and secure with double knots. The knots should be near the seam, so that the presentation side looks neat.

- Stretch out the skin at either end, and over the meat (if possible). You can tie a string across the turkey roulade horizontally as well, to help maintain the shape further.
Alternatively, you can roll up the roulade and then tightly wrap it with plastic wrap without using any twine. However, it’s a little more tricky to keep the shape this way, and I prefer to use twine.

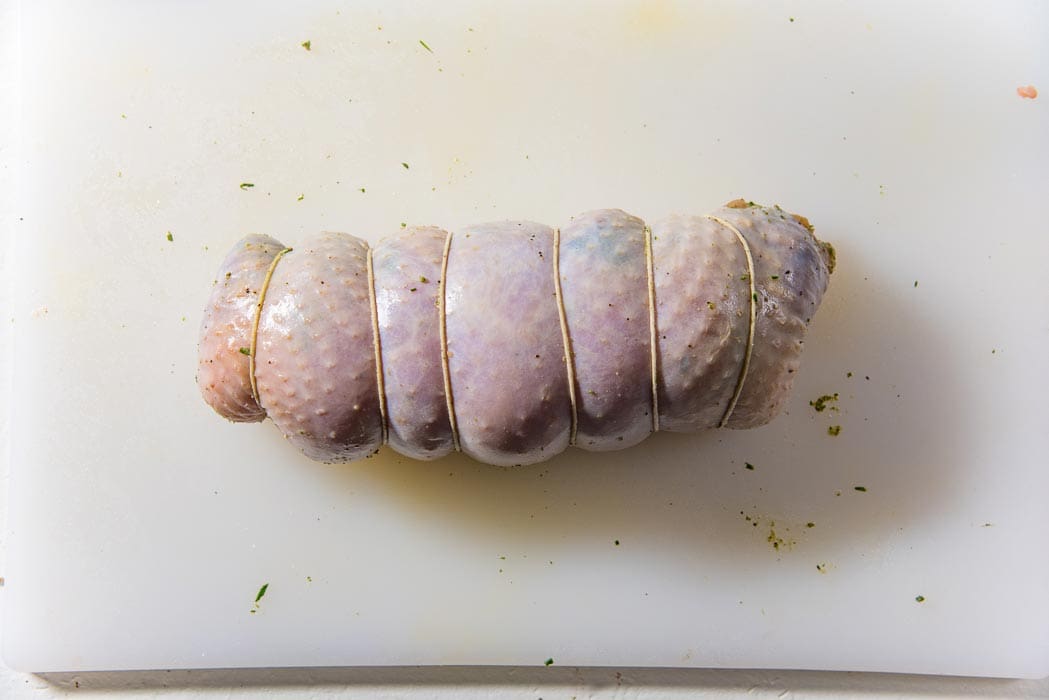
Now you have an assembled turkey roulade!
Step eight – Store the turkey roulade to let it marinate
Tightly wrap the roulade in plastic wrap (with or without twine), and store in the fridge until you’re ready to cook it. I recommend that you refrigerate the turkey roulade for AT LEAST 8 hours before cooking.
This achieves two things,
- The marinade will season the turkey meat from the inside.
- The rolled up turkey roulade will chill in the fridge allowing the shape to “set”.
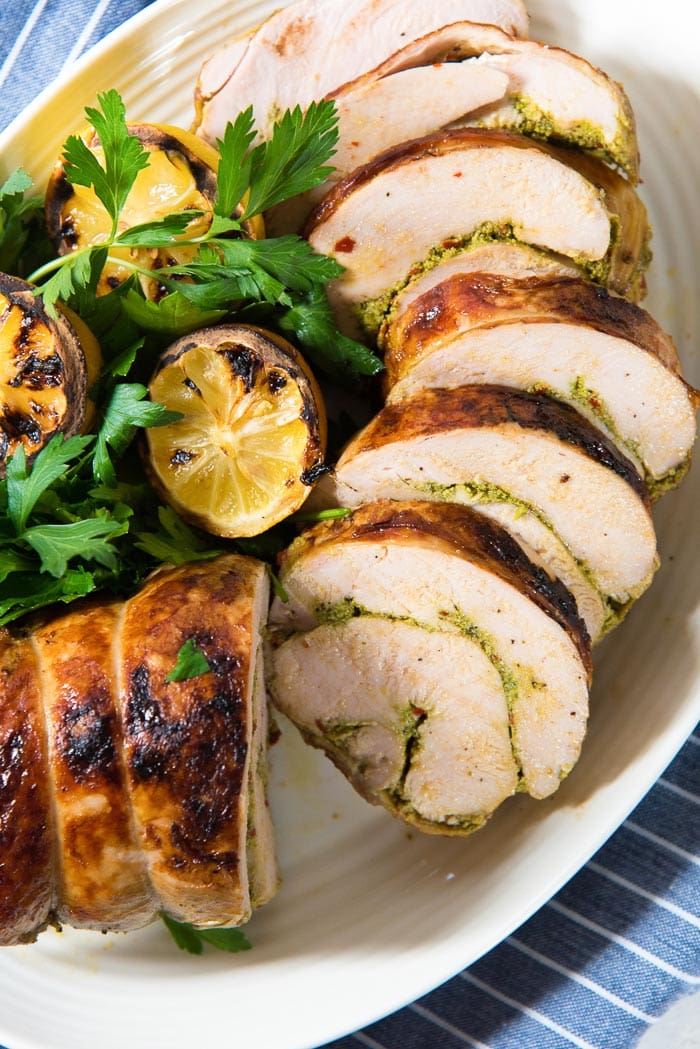
Step nine – Cook!
You can cook this turkey roulade in two ways.
- Slow roasting it in the oven (slow roasted turkey roulade)
- Or by using a sous vide (sous vide turkey roulade)

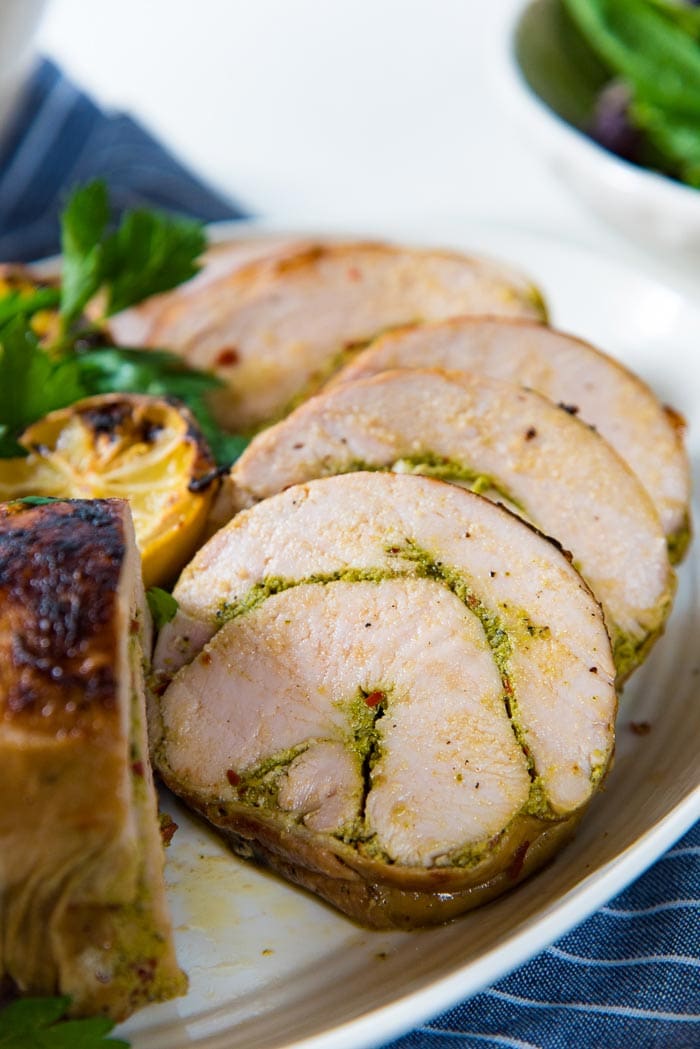
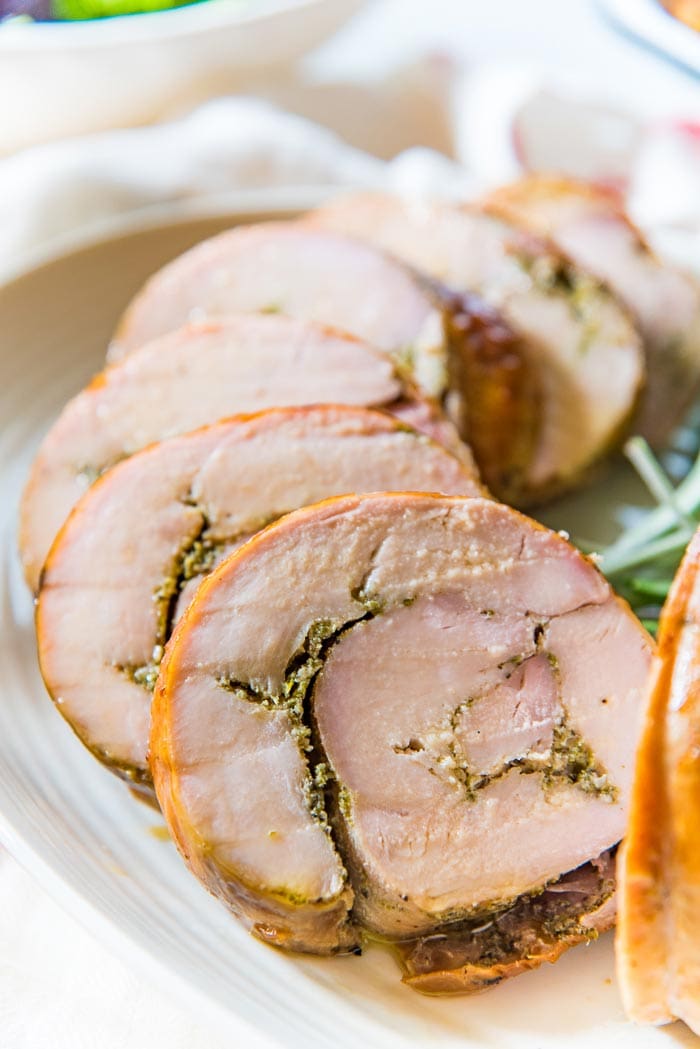
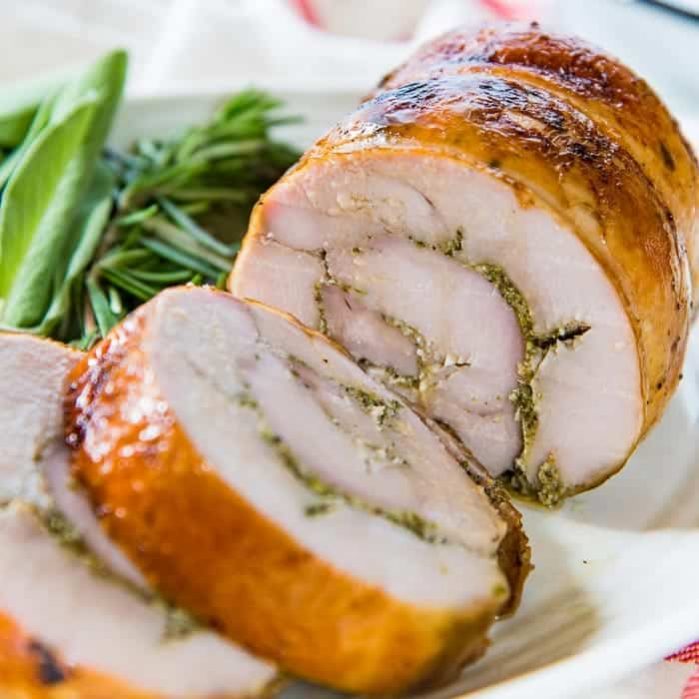
I’ve shared my detailed recipe showing you how to cook the turkey roulade in the oven in my slow roasted turkey roll post. The result is an incredibly delicious, juicy, perfect turkey roulade!
How will you be cooking your turkey this year? A turkey roulade is well worth the effort, and is a showstopping alternative to a whole roasted turkey that’s sure to impress your family and friends!

So to summarize, here are the steps that I detail in the post above to assemble a boneless turkey roulade for your Thanksgiving spread!
Summary of how to make a turkey roulade with a full bone-in, skin on turkey breast
- Step 1 – Carefully remove the turkey skin.
- Step 2 – Fillet both turkey breasts from the bone.
- Step 3 – Remove the turkey tenderloin.
- Step 4 – Butterfly the turkey breast meat to make it evenly thick.
- Step 5 – Clean the skin by removing excess fat.
- Step 6 – Prep the meat and skin for the roulade, including flavoring of the meat.
- Step 7 – Assembling the roulade – roll up the meat and tie it up.
- Step 8 – Store the turkey roulade in the fridge to marinate and set.
- Step 9 – Cook
- Slow roasting it in the oven (slow roasted turkey roll).
- Or by using a sous vide (sous vide turkey roll).

Jen Beck says
I went looking online for a rolled turkey breast recipe to SV this Thanksgiving, and yours looks perfect! Since there’s only two of us, I figured on a half breast rollup. Do I need to change the cook time since the roll won’t be as thick? If so, do you have a suggestion?
As a p.s., the Anova site has a great recipe for sous vide potatoes for those with more than one SV setup, or that could be SV’d ahead and warmed back up. I put roasted garlic in mine, delicious!
Dini says
Hi Jen
I haven’t made this with a single turkey breast. A single turkey breast will have to be pounded to a thinner thickness to be able to roll up, so the cook time can reduce. If the meat will be the same thickness as in the post, then the cook time shouldn’t change, as the thickness of the meat is what is more important.
However, I prefer to make this with both turkey breasts for consistency. My husband and I then have enough leftovers for turkey sandwiches for the next day.
Hope that helps.
Lianna Mills says
You saved my Thanksgiving!
My butcher totally misunderstood what I wanted and cut the whole breast in half! Geez…
Anyway, your step by step process helped me visualize and make the perfect roulade.
A wonderful Thanksgiving turkey out of a possible disaster.
Thank you, Thank you!!
Fred says
Wonderful recipe! How long can you keep in refrigerator? Can they be frozen?
Dini says
Hi Fred!
Sorry for the late reply.
Yes it can be frozen for up to 1 month. It can be kept in the fridge for about 2 – 3 days.
Hope that helps!
Dini
Millennial Boss says
What did you use for the paste? Looks great.
Dini says
Hi Millenial Boss,
I have used two types of pastes in the post, both of which I have linked to in the post too 🙂 One roulade has a sage rosemary paste – which I slow roasted, and the other roulade has a herb garlic paste – which I cooked in a sous vide! Both recipe links can be found in the post 🙂 I hope that helps!
Penny Wolf says
Beautiful instructions with photos. I have always wanted to make a turkey roulade but was very unsure. You have shown that it is doable! Thank you!
Helen says
This is ridiculously impressive, Dini!
Just look at it – restaurant quality for sure!
I bet it’s incredibly moist and flavorsome.
I’m so sold!
Nellie Tracy says
This recipe has excellent instructions making it so much easier to make than I thought it would be!